Showing posts with label Tuesday Taste Buds. Show all posts

Tuesday, April 24, 2012

Tuesday Taste Buds: Two Tomato Pasta


Two Tomato Pasta with Mozzarella, Basil &Pine Nuts
I spotted this off Pinterest (of course) and yes, the picture was stunning but it had me drooling.
So I had to try it!
It's simple ingredients make it an easy weekday meal!

Recipe from The Italian Dish
Ingredients:
  • 10 ounces of grape tomatoes
  • 2 large garlic cloves, minced or grated
  • 6 tablespoons extra virgin olive oil, divided
  • salt & pepper
  • 1/3 cup pine nuts
  • 10 ounces spaghetti
  • 14 ounces very small tomatoes (about 8 to 10), cut into chunks
  • 4 ounces mozzarella, cubed
  • about 10 basil leaves, julienned
Instructions:
For the slow roasted tomatoes: Preheat oven to 300 degrees F. Line a baking sheet with foil. Slice grape tomatoes in half and place on baking sheet with the garlic and 2 tablespoons olive oil. Season with some salt and pepper. Toss well. Bake for about two hours or until the tomatoes are reduced down and have lost a lot of their moisture.
Toast the pine nuts: Place pine nuts in a small skillet. Cook over medium high heat just for a few minutes, until lightly toasted.
Bring a large pot of well salted water to a boil. Cook the pasta just until al dente. Remove with tongs and place in a large serving bowl (don't drain- you want a little pasta water still on the pasta so it doesn't stick). Add the slow roasted tomatoes, the toasted pine nuts, the fresh tomatoes, the mozzarella, 4 tablespoons olive oil and the basil leaves. Season generously with salt and pepper and toss well.

#87 DZP 1/5 Done!

Tuesday, March 20, 2012

Tuesday Taste Buds: {Homemade} Twix Bars

{Homemade} Twix Bars

Or Thousand Dollar Bars as King Arthur calls them. Either name they still look delicious!


{Recipe summary}
Hands-on time: 20 mins. to 30 mins.
Baking time: 35 mins. to 45 mins.
Total time: 2 hrs 5 mins. to 2 hrs 25 mins.
Yield: One 9" x 13" x 2" pan

Shortbread layer
·         cup (2 sticks) salted butter, at room temperature
·         1 cup confectioners' sugar
·         2 teaspoons vanilla extract
·         2 cups King Arthur Unbleached All-Purpose Flour

Caramel layer
·         2 cups caramel, cut into small chunks
·         3 tablespoons heavy cream

Chocolate layer
·         3 cups chopped milk chocolate or dark chocolate, melted
·         1 tablespoon vegetable shortening (optional)

DIRECTIONS:

1)      FOR THE CRUST: Preheat your oven to 300°F. Spray a 9" x 13" pan lightly with cooking spray, or line with parchment, and set aside.

2)     In a medium-sized bowl, beat together the butter, sugar and vanilla. Add the flour. At first the mixture may seem dry, but will come together as you continue to beat at medium speed.

3)     Take the dough (it will be somewhat stiff) and press it evenly into the pan. Lightly flouring your fingertips will help with any sticking.

4)     Prick the crust all over with a fork. The holes will allow steam to escape and the crust will bake evenly with fewer bubbles.

5)     Bake the crust until it's lightly golden brown on top and the edges are deeper golden brown, about 35 to 45 minutes. Remove from the oven and immediately run a knife around the edges to loosen the crust. Set it aside to cool completely.

6)     FOR THE CARAMEL LAYER: Melt the caramel and cream over low heat in a small saucepan. Pour the caramel over the cooled crust and set in the refrigerator for 30 minutes to chill and firm up.

7)     FOR THE CHOCOLATE LAYER: Melt the milk or dark chocolate slowly in a double boiler or over very low heat. If it seems very thick, add a tablespoon of shortening to thin it. Pour evenly over the chilled caramel layer and spread to cover all of the caramel. Return to the fridge until the chocolate is well set. Cut into 2" x 2" squares to serve. It's best to store these bars in the refrigerator.

8)    These bars can also be cut and dipped in milk chocolate to resemble Twix bars. After the caramel layer has chilled firm, cut down the length of the pan, splitting the bars into two long, narrow bars. Then cut each long strip into "fingers". Dip the chilled bars into melted chocolate and place on parchment paper to set for several hours.

Tuesday, March 13, 2012

Tuesday Taste Buds - Margarita Cupcakes


¡Salud!

A while ago, I found this recipe and seeing how I just came back from Mexico (and not to mention that I also drank my fair share of margaritas there) I felt that these cupcakes were perfect to make!

It's simple and doesn't take that long to make. Just prep, throw in the oven, drink your share of a margaritas in your favorite margarita glass, take a shot of tequila, and take out cupcakes to cool.

For the icing: not complicated either! Whip them together, take another shot, pucker up lips for sour lime juice, and lick frosting off the spatula!

But here's the recipe adapted from Homemade By Holman


Cupcakes:
1 box white cake mix

7 1/2 ounces margarita mix
2 ounces tequila
1/2 ounce orange juice
3 large egg whites
2 tbsp vegetable oil
Zest of 1 lime

Preheat oven to 350 degrees and line 24 muffin tins with paper liners or spray with baking spray. Mix together margarita mix, tequila and orange juice in a large measuring cup. Add cake mix to mixing bowl and add egg whites, oil, lime zest and tequila mix. Beat on low speed for about 30 seconds until dry ingredients are incorporated and then beat on medium high speed for 2 minutes. Spoon batter evenly into muffin cups, filling about 2/3 of the way full. Bake for 20-25 minutes until a toothpick inserted in the center cupcake comes out clean. Cool about 5 minutes in the pan and then cool completely on wire racks.


Icing:
8 oz cream cheese, room temperature
1/2 cup unsalted butter, room temperature
2-3 tbsp lime juice
4 cups powdered sugar
1 tsp lime zest
3-4 drops green food coloring

Beat cream cheese and butter on medium high speed until smooth and fluffy, about 3 minutes. Add 2 tbsp lime juice and lime zest and beat until combined. Add powdered sugar 1 cup at a time, beating on low speed until incorporated. Add more lime juice if necessary. Add food coloring a couple drops at a time and beat on medium high speed until desired color is reached and icing is smooth. Pipe onto cooled cupcakes as desired.


Lime wedges, straws, and sprinkles all make festive garnishes. Refrigerate cupcakes in an airtight container if not serving immediately and bring to room temperature a couple hours prior to serving.


2/5 Done on #88 DZP!

Tuesday, February 14, 2012

Tuesday Taste Buds: Red Velvet Cupcakes with Cheesecake Filling

Red Velvet Cupcakes
with Cheesecake Filling
& Cream Cheese Frosting


Thanks to Pinterest and Sweet Little Details, I now have a wonderful new red velvet cupcake recipe! I made it for Valentine's Day and they seem to be a hit! Yeah!

"Surprise Red Velvet Cupcakes" makes 2 dozen cupcakes (and then some)

Filling
I doubled the recipe like the Jen @ Sweet Little Details Blog said she does, and I had plenty extra left over, so next time I'm going to try just the one batch.
1 8oz package cream cheese, softened
1 egg
1/3 cup sugar
8-10 ounces of white chocolate chips (I think next time I'm not going to throw these in, just the cheese)

In a small bowl, blend cream cheese, egg and sugar. Beat until smooth. Add white
chocolate chips.

Red Velvet Cake
Jen also said she used a boxed Red Velvet Cake mix, so I did too! Just prepare as normal.
If you want a recipe, click the link above... she has a recipe on her blog too.

Fill prepared pans 2/3 full and top with heaping teaspoon of filling. Bake at 350 for 20 -25 minutes.
If you choose to frost these cupcakes, cool completely before frosting.

Cream Cheese Frosting
2 8 oz packages cream cheese, softened
1/2 cup butter, softened
2 pounds confectioners sugar
2 teaspoons vanilla

Cream together cream cheese and butter. Beat in vanilla. On low speed, add confectioners sugar a little at a time. Once all sugar has been added increase to medium speed until frosting is creamy.

1/5 Done on #88 DZP!

Tuesday, February 7, 2012

Tuesday Taste Buds: Red Velvet Cupcakes


Seeing how Valentine's Day is just a week away, Red Velvet is very popular this time of year. It's a delicious chocolate red-dyed cake and creamy cheese frosting. Now if you have never had a slice of red velvet heaven, then first: shame on you, and second: do it, do it now! I think I'll make some of these bad-boys for the bf since I know he LOVES red velvet :)


Pin It
 
So here's a great recipe from Martha Stewart's Favorite Cupcakes:
Ingredients
  • 2 1/2 cups cake flour (not self- rising), sifted
  • 2 tablespoons unsweetened Dutch-process cocoa powder
  • 1 teaspoon salt
  • 1 1/2 cups sugar
  • 1 1/2 cups vegetable oil
  • 2 large eggs, room temperature
  • 1/2 teaspoon red gel-paste food color
  • 1 teaspoon pure vanilla extract
  • 1 cup buttermilk
  • 1 1/2 teaspoons baking soda
  • 2 teaspoons distilled white vinegar
Directions
1. Preheat oven to 350 degrees. Line standard muffin tins with paper liners. Whisk together cake flour, cocoa, and salt.
2. With an electric mixer on medium-high speed, whisk together sugar and oil until combined. Add eggs, one at a time, beating until each is incorporated, scraping down sides of bowl as needed. Mix in food color and vanilla.
3. Reduce speed to low. Add flour mixture in three batches, alternating with two additions of buttermilk, and whisking well after each. Stir together the baking soda and vinegar in a small bowl (it will foam); add mixture to the batter, and mix on medium speed 10 seconds.
4. Divide batter evenly among lined cups, filling each three-quarters full. Bake, rotating tins halfway through, until a cake tester inserted in centers comes out clean, about 20 minutes. Transfer tins to wire racks to cool completely before removing cupcakes. Cupcakes can be stored overnight at room temperature, or frozen up to 2 months, in airtight containers.
5. To finish, use a small offset spatula to spread cupcakes with frosting.

Martha’s Note: Gel-paste food color is much more concentrated than the supermarket liquid variety; if you substitute the liquid, you may need to add an entire bottle (1.5 ounces) to achieve the desired shade.

Cream Cheese Frosting:
Ingredients


  • 8 ounces (2 sticks) unsalted butter, room temperature
  • 12 ounces cream cheese, room temperature
  • 1 pound (4 cups) confectioners' sugar, sifted
  • 3/4 teaspoon pure vanilla extract

  • Directions
    1. Beat butter and cream cheese with a mixer on medium-high speed until fluffy, 2 to 3 minutes. Reduce speed to low. Add sugar, 1 cup at a time, and then vanilla; mix until smooth.

    Tuesday, January 31, 2012

    Taste-Bud Tuesday: Olive Garden Salad Dressing

    I found this through Pinterest (yes, I've been on a LOT lately) and if you've been to Olive Garden, chances are you've had their salad and their amazing salad dressing. It's practically to buy for! (which you can too ya know!) But this DIY recipe makes me want to create it myself, and have an Olive Garden Dinner-night! 

    Brandie over at The Country Cook was right by saying that Olive Garden's dressing is pretty much "the holy grail of salad dressings". And I'm one of those fanatics that go there JUST for the salad and breadsticks!


    Ingredients:
    1 packet Good Seasonings Italian Dressing
    (Ingredients needed to make dressing: oil, water, vinegar)
    1/2 tsp dried Italian Seasoning
    1/2 tsp table salt
    1/4 tsp black pepper
    1/2 tsp sugar
    1/4 tsp garlic powder
    1/2 tbsp mayonnaise
    1/4 cup olive oil
    2 tbsp white vinegar
    1 1/2 tbsp water

    Directions:
    - Prepare Good Seasonings Italian Seasonings Dressing as it states on back of package. Once prepared pour it in a medium bowl, then add additional ingredients listed above (starting with driend Italian Seasoning).
    - Using a whisk, mix all ingredients until mixed thoroughly combined. Serve with your favorite salad fixings.
    - Store unused dressing in a sealed container in the regrigerator for up to 4 weeks. Be sure to give the bottle a good shake before using.

    Tuesday, January 24, 2012

    Taste Bud Tuesday: Homemade {Twinkies}

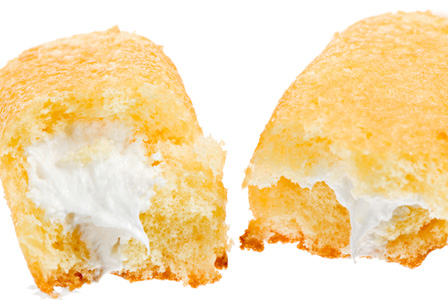
    Homemade Twinkies!

    *Say Whaaa!*
    Saw this recipe from my newly acquired pinterest account, and I would love to make these. I'm not the biggest fan of twinkies, but read the recipe, and you'll see with the ingredients it sounds deee-lish!! Besides, it's {homemade!!}

    Ingredients: 

    For the cake: 
    • 1/2 cup sugar
    • 1/2 cup brown sugar
    • 2 eggs
    • 1-1/4 cups all-purpose flour
    • 1/2 cup milk 
    • 1/3 cup canola oil
    • 1 teaspoon baking powder
    • 1 teaspoon vanilla
    For the filling: 
    • 1/3 cup shortening
    • 1/4 cup sugar
    • 1/2 teaspoon vanilla extract
    • 1/4 cup light cream
    • 1/2 cup confectioners' sugar

    Directions: 

    1. Preheat the oven to 350 degrees F. Grease three mini loaf pans with cooking spray. 
    2. Beat the eggs and sugar with a handheld mixer until thick. Slowly add in all other ingredients and beat until fully combined. Divide the batter among the mini loaf pans, filling about 3/4 full. Bake cakes for at least an hour, or until golden brown. Cool in pans and then transfer to a wire cooling rack.
    3. While cakes cook, prepare filling by mixing shortening, sugar, vanilla and light cream with a hand mixer. Once mixed, slowly add in sugar and beat until combined. Fill a pastry bag with frosting and cut a small hole. 
    4. Once cakes have cooled, carefully poke three holes in the bottom of the cakes. Pipe frosting into the holes until just filled. Cool for at least 20 minutes and enjoy!
    Also hop on over to the website I saw this from and they have other Hostess related recipes that are easy {DIY yummies!}

    Tuesday, January 17, 2012

    Tuesday Taste Buds: Bitchin' Bourgignon

    Got this from Nadia G's Bitchin' Kitchen tweet, and I love it! Enjoy! :)

    Tuesday Boozeday: Bitchin' Bourguignon!

    It was the legendary Julia Child that transformed boeuf bourgignon, a classic French working man’s dish, into a staple of American fine dining. A lot of people are super nervous to try this recipe out because it takes so long. No worries! Despite the hype, this wine based dish is incredibly forgiving and super-delicious! Plus, it uses an entire bottle of red wine and we’re pretty sure that’s awesome.
    Ingredients:
    6 ounces pancetta
    3 lbs stewing beef
    1 bottle of dry red wine (a Burgundy works well)
    3 cups beef stock (just above room temperature)
    2 large carrots, diced
    1 red onion
    2 tbsp olive oil
    3 garlic cloves mashed
    2 tbsp salt
    Freshly ground pepper
    2 bay leaves
    1 sprig of thyme
    ¼ cup flour

    optional:
    ½ pound mushrooms
    2 tbsp butter
    1 tsp olive oil


    Directions:
    Dice pancetta into 1-inch size pieces. Heat a dutch oven and fill with olive oil, add pancetta and cook until crispy. Remove cooked pancetta from pan.

    In a plastic bag place the beef, flour salt and pepper, shake to coat the pieces thoroughly. Take pieces out of the bag (shaking to remove excess flour) and put on a plate.

    Add beef to the dutch oven in small batches, do not overcrowd! Brown each piece until golden and crisp on either side. Remove beef and place on a clean plate.

    Next, add onions and half the bottle of red wine to de-glaze the pan (scrape the bottom to get all the good greasy bits out), cook until the onions are translucent.

    Then, add the browned beef, beef stock, 1tbsp of salt, cooked pancetta, garlic, carrots, herbs and freshly cracked pepper. Cook on medium-low for 3-4 hours or longer if using a slow cooker (closer to 6-8 hours depending on the heat) instead of a dutch oven. The lower the heat, the longer you have to cook it for. You’ll know it’s done when the meat practically falls apart when you shove a fork in to it.

    For the Mushrooms:
    Heat olive oil and butter in a pan on medium, add mushrooms and cook until browned. Add to stew at the same time as the beef.

    Serve with french bread, focaccia or anything bread-like and absorbent to soak up all that delicious sauce! It also works great served on a bed of mashed cauliflower!


    As Julia Child would say: Bon Appétit

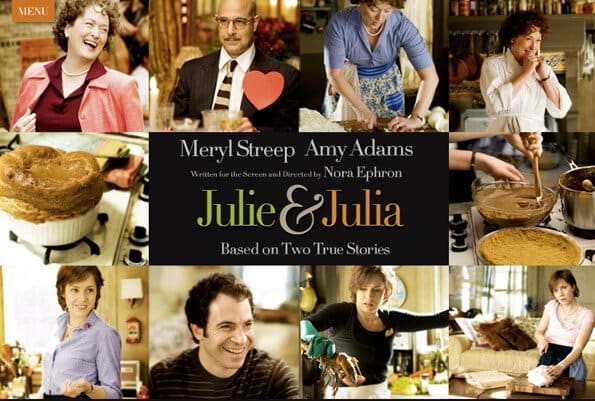
    #98 DZP: Julie & Julia


    In 2002, Julie Powell is a young writer with an unpleasant job at the Lower Manhattan Development Corporation's call center, where she answers telephone calls from victims of the September 11 attacks and members of the general public complaining about the LMDC's controversial plans for rebuilding the World Trade Center. To do something she enjoys, she decides to cook every recipe in Mastering the Art of French Cooking (1961) by Julia Child in one year; Powell decides to write a blog to motivate herself and document her progress.

    Woven into the story of Powell's time in Queens in the early 2000s is the story of Child's time in Paris throughout the 1950s, where she attends Le Cordon Bleu to learn French cooking and begins collaborating on a book about French cooking for American housewives. The plot highlights similarities in the women's challenges. Both women receive much support from their husbands, except when Powell's husband becomes fed up with her excessive devotion to her hobby and leaves her for a short time.

    Eventually, Powell's blog is featured in a story published in The New York Times, after which her project begins to receive the attention of journalists, literary agents, publishers, and a dismissive response from Child herself. Although Child's book is rejected by Houghton Mifflin, it is accepted and published by Alfred A. Knopf. The last scene shows Powell and her husband visiting Child's kitchen at the Smithsonian Institution and Child in the same kitchen receiving a first print of her cookbook and celebrating the event with her husband.

    I have to say this was such an adorable movie, and it was a shame I didn't see this back in 2009!
    I watched this with my Mother, and it was a great movie to watch with my personal baking inspiration (thanks mommy!). Now after watching this movie, I want to tackle a chef/cook/baker of today and cook/bake my way through their cook book! Maybe Alton Brown's Good Eats (part 1, 2, OR 3). Or Giada De Laurentiis' Giada at Home: Family Recipes from Italy and California and learn all her Italian cooking. Or Anne Burrell's Cook Like a Rock Star. Or Nadia G's Bitchin' Kitchen: Cookin' for Trouble! All great books and I would love to cook a recipe a day from those Kitchen Masters. Alex and I watch plenty of Food Network and Cooking Channel, and yes indeed we "stay hungry". But now being inspired by Julie Powell's love for cooking and love for Julia Child, I want to embrace a cookbook and learn something new and maybe one day teach it to Ryan!

    Tuesday, December 13, 2011

    Tuesday Taste Buds: Apple Cider Snickerdoodle Cookies

    So last weekend Erin over at the L&C hosted a lovely Christmas cookie exchange party, second annual btw. There were several types of cookies but this recipe caught my taste buds by surprise. I always enjoy a good snickerdoodle cookie, but *be still my heart* an APPLE CIDER one! Oh that I had to try one.... or five. The kick ass Miss Taryn at Pink.Dazzle.Gloss introduced me to a wonderful new holiday cookie and was so kind to give me the recipe (to share with you too of course!)


    Ingredients:

    1 1/4 cups apple cider
    1 1/2 cups all-purpose flour
    1 teaspoon cream of tartar
    1/2 teaspoon baking soda
    1/2 teaspoon ground cinnamon
    1/2 teaspoon kosher salt
    1/2 cup unsalted butter, at room temperature
    1/2 cup granulated sugar, plus 3 tablespoons for rolling
    1/4 cup packed light brown sugar
    1 large egg
    1/4 cup plus 2 tablespoons finely chopped red and green crispy apple chips, plus whole chips for garnish
    2 teaspoons apple pie spice (or a little extra cinnamon if you can't find the spice)


    Directions:

    - Preheat the oven to 400 degrees F.

    - Heat the cider in a medium skillet over medium-high heat until it comes to a boil. Continue to cook until syrupy and reduced to about 2 tablespoons, 12 to 14 minutes. Set aside to cool slightly.

    - Whisk the flour, cream of tartar, baking soda, cinnamon and salt in a medium bowl until smooth. Beat the butter with 1/2 cup of the granulated sugar and the light brown sugar in a separate bowl on medium-high speed until fluffy and smooth, 2 to 3 minutes. Beat in the reduced cider and the egg (the mixture may look slightly curdled). Stir in the flour mixture and 1/4 cup of the chopped apple chips until combined.

    - Stir together the remaining 3 tablespoons of granulated sugar, 2 tablespoons of chopped apple chips and the apple pie spice in a small bowl. Roll heaping tablespoons of dough into balls, using lightly moistened hands if the dough is too sticky, and then roll in the spiced sugar mixture. Place the dough balls 3 inches apart on ungreased baking sheets and top with a few pieces of whole apple chips. Bake until the edges are just set but centers are still soft, 11 to 13 minutes, rotating pans halfway through the baking time. Cool 2 to 3 minutes on the baking sheet, and then transfer to a wire rack to cool completely.


    Tuesday, November 29, 2011

    Tuesday Taste Buds: Mom's Chicken Soup


    My Mom’s Chicken Soup


    Whenever I felt under the weather, my mother always made me chicken soup to make me feel better. Made from scratch and past down from her mother, this soup has always had a better effect than any cold medicine ever will on me! Just the smells from it can make you feel better!


    Now that I’m older and my mother is not always there for me whenever I get sick, I have to make it for myself. Forever from her heart she past the soup’s recipe to me which I plan to give to my children (and to you too!) The ingredients she said ‘should be measured by senses’. No teaspoon or measuring cup could tell her how much was right for her soup. You make it to your liking.

    There are so many different kinds of chicken soup, made from several grandmothers and mothers all over the world, yet whenever I start to sniffle, or I hear a cough, I grab my “mommy’s recipe” every time. Maybe that’s why I have a constant stock of chicken broth in my cupboard!


    What you’ll need:

    • 1 whole chicken
    • 2 to 3 boxes of organic chicken broth
    • “Better than Bullion” chicken (2 spoonfuls)
    • Seasoning: poultry seasoning, thyme, 2 bay leaves, oregano, marjoram, pepper, and a little bit of salt.
    • Vegetables: carrots, celery (keep leaves), 2 onions, potatoes
    • 2 large cooking pots
    • Strainer, Colander
    • Optional: macaroni/egg noodles, rice

    Directions:

    1. Wash chicken. Take out the gizzards, leftover feathers, and extra fat.

    2. In one pot, add broth to cover the chicken. Add onions (cut one onion into fourths), and celery leaves.

    3. Add seasoning and bullion
    4. Bring to a boil, and then set to simmer. Cook till chicken comes off the bone.

    5. In the other pot, place colander in to strain broth into it from the first pot. Let the chicken and vegetables cool down in strainer.

    6. Tear off chicken meat and put into pot with the broth. Throw away bones, skin, and the old/used vegetables.

    7. Cut carrots, celery, onions, and potatoes. Put into pot. Cook till vegetables are done.

    Optional: Cook macaroni or egg noodles in other pot, then add to soup once cooked, or put soup over rice.


    Tuesday, October 11, 2011

    Tuesday Taste Buds: Pumpkin Pie Oh My!


    It's October Pumpkin season and that means one thing for bakers: Pumpkin Pie!!!
    I love me some Paula Dean and all her buttery goodness! She has this recipe on Food Network and I had to share it. I'm not one for pumpkin pie/cake/muffins/etc but this looks so good, especially with a dab of whip cream.
    Eat up ya'll!

    Ingredients:
    • 1 (8-ounce) package cream cheese, softened
    • 2 cups canned pumpkin, mashed
    • 1 cup sugar
    • 1/4 teaspoon salt
    • 1 egg plus 2 egg yolks, slightly beaten
    • 1 cup half-and-half
    • 1/4 cup (1/2 stick) melted butter
    • 1 teaspoon vanilla extract
    • 1/2 teaspoon ground cinnamon
    • 1/4 teaspoon ground ginger, optional
    • 1 piece pre-made pie dough
    • Whipped cream, for topping
    Directions:

    - Preheat the oven to 350 degrees F.
    - Place 1 piece of pre-made pie dough down into a (9-inch) pie pan and press down along the bottom and all sides. Pinch and crimp the edges together to make a pretty pattern. Put the pie shell back into the freezer for 1 hour to firm up. Fit a piece of aluminum foil to cover the inside of the shell completely. Fill the shell up to the edges with pie weights or dried beans (about 2 pounds) and place it in the oven. Bake for 10 minutes, remove the foil and pie weights and bake for another 10 minutes or until the crust is dried out and beginning to color.
    - For the filling, in a large mixing bowl, beat the cream cheese with a hand mixer. Add the pumpkin and beat until combined. Add the sugar and salt, and beat until combined. Add the eggs mixed with the yolks, half-and-half, and melted butter, and beat until combined. Finally, add the vanilla, cinnamon, and ginger, if using, and beat until incorporated.
    - Pour the filling into the warm prepared pie crust and bake for 50 minutes, or until the center is set. Place the pie on a wire rack and cool to room temperature. Cut into slices and top each piece with a generous amount of whipped cream.

    Tuesday, October 4, 2011

    Tuesday Taste Buds: Pasta w/Sausage & Tomatoes


    Ingredients:
    - 2 28-ounce cans whole peeled tomatoes, broken up with your hands
    - 2 cloves garlic, peeled and smashed
    - 2 tablespoons olive oil
    - kosher salt and black pepper
    - 3/4 pound sweet or hot Italian sausage links
    - 12 ounces cavatappi or some other short pasta
    - 3 cups baby spinach (2 1/2 ounces)
    - grated Parmesan, for serving


    Directions:
    1. Heat oven to 450° F. On a rimmed baking sheet, mix the tomatoes (with their juices) and garlic with the oil, ½ teaspoon salt, and ¼ teaspoon pepper. Roast until the tomatoes have charred in spots and the juices have thickened, 40 to 45 minutes.

    2. After the tomatoes have roasted for 20 minutes, place the sausage on a second rimmed baking sheet. Roast, turning occasionally, until browned and cooked through, 15 to 17 minutes. Thinly slice the sausage.

    3. Meanwhile, cook the pasta according to the package directions. Reserve ¼ cup of the cooking water; drain the pasta and return it to the pot. Add the tomatoes, sausage, spinach, and 2 tablespoons of the cooking water and toss to combine (add more cooking water if the pasta seems dry). Sprinkle with the Parmesan.

    My friends and I have pasta night sometimes, and we usually have just spaghetti in meat sauce with sausage, or a sausage link pan-fried up on the side. But this might be the next pasta night dish: a spin on our classic favorite! Don't you agree?!